Tuesday, October 19, 2010

Beef Bourguignon


As you know from the last blog, Jan's birthday is in October. She love love loves October...fall foods, crisp air, yellow leaves....you know the deal. As a result, October is simply called Jan's birth month, and she likes to celebrate all month.

This year I wanted to take her out for dinner, but her version of "out for dinner" meant "out to the wood burning oven". OK OK I thought that was reasonable...probably cheaper too...and if she cooked, I would be her assistant and write a blog about it. So here we go...

This was her itinerary for her birthday. Light the fire in the oven, and get the temperature to maybe 350 degrees. That seemed easy enough. So far so good. She wanted to try a french dish, Beef Bourg...something. I couldn't say it, but she couldn't either. Evidently this dish cooks for hours and hours, and during that time she wanted to go on a hike, and have appetizers on the Caribou River. Sounded good to me.
This is her new birthday present. Cast iron from Finland. I liked the handle. I think she liked it better than the vacuum cleaner I got her. We won't dwell on that, so onward to the oven. I got the temperature to 450 degrees. I thought that was close enough. She did too. The new pot and the french stew went into the oven, and we were on our way...
The birth month girl...

...and her sherpa, carrying her prize winning leaves in my backpack. I think I'm doing a pretty good job at this birthday stuff.

Now, on to the appetizers...and her favorite wine holder on the Caribou River. My backpack now had cheese and crackers instead of leaves...but I forgot the picnic blanket. In my mind, that was the minor part. Jan, on the other hand, would forget the corkscrew, but not the blanket.

Back to the oven where the mushrooms are added for one of the final steps. Now the oven is where it should be...about 350 degrees. Keep in mind, I have been adding wood periodically. Afterall, that was one of my responsibilites as the assistant.
I have to say. This was lookin good. Really good. Jan toasted some baguettes in the oven, then swiped a garlic clove over the warm toast. It smelled great.

The french stew was served over the garlic toast. It was an amazing meal...probably because of my assistant skills.

I will let Jan write the recipe:

Beef Bourguignon
combined recipe from Barefoot Contessa and The Kitchen Window, Minneapolis
adapted to feed 2 - 3 people

4 oz thick applewood smoked bacon
good olive oil
1 1/2 lbs chuck beef cut in 1 inch cubes
1/2 lb carrots in 1 inch chunks
1 onion, sliced
1 large clove garlic
1/2 bottle good red wine (I used a Pinot Noir)
1 cup beef broth
1 tablespoon tomato paste
1/2 tsp dried thyme leaves
2 tablespoon butter
1 1/2 tablespoon flour
1 lb fresh mushrooms

Cook bacon until crisp.

Dry beef cubes with paper towel, sprinkle with salt and pepper, and brown in olive oil. Remove from pan. Add a little more olive oil, onions, carrots, some salt and papper, and sautee for 10-15 minutes until onions are lightly browned. Add garlic and cook 1 more minute.

Put meat and bacon back in the pot with the juices, and add the wine and enough beef broth to almost cover the meat. Add tomato paste and thyme.

At this point, I brought it to the wood burning oven which was 450 degrees...a bit hot maybe, but it seemed to work fine. We let it burn down to a small flame before we added more wood, and so most of the cooking time it was about 350 degrees.

About 15 minutes before eating, we added the mushrooms which had been sauteed in butter, and the 1 1/2 tablespoon of flour which had been smashed with a tablespoon of butter.

We let this simmer to thicken a bit and used that time to toast the baguette, rubbing with a clove of garlic after they were hot and toasted.

We served the beef over the toasted bread, and sprinkled with fresh parsley...

(ps from the assistant) I think I did a pretty good job. I even found a candle.


Oatmeal Date Cake

Jan's birthday is in October, and she says the leaves are always peak for her birthday. This year was no different. The leaves were good. Humble as I am though, I think the cake I made for her was even better.
Oops. Slopped a bit on the sides as I slid it in the oven.

After it was done, I spooned on the icing. Coconut, butter, pecans, sugar to be broiled. How does one broil in a woodburning oven? A flame of course. I added some kindling to the coals. Now it's starting to get fun.
Not a bad broiler.

This is absolutely my favorite cake. Moist and delicious. I ate most of it. But just so you don't think I am selfish, it's Jan's favorite cake too...and I let her have a piece.


Oatmeal Date cake

from Doris Lund

  • Pour 1 cup boiling water over:
  • ½ cup(+) chopped dates
  • 1 cup oatmeal.
  • Let cool.
  • Cream together the following:
  • 1 cup brown sugar
  • ½ cup white sugar
  • 2 eggs
  • ½ cup butter
  • Add flour mixture:
  • 1 cup flour (+)
  • 1 tsp soda
  • ½ tsp cinnamon
  • 1 tsp vanilla
  • Add oatmeal mixture
  • Bake at 350 for approximately 30 minutes or until center is done. This is easiest in a 7x11 pan, but a square 9x9 works or a springform pan (adjust baking time).
  • Mix the following, spread on warm cake and broil for 1-2 min until brown:
  • ¼ cup butter
  • 2/3 cup brown sugar
  • ½ cup pecans
  • 1 cup coconut
  • 3 Tbls milk
On my way back to the cabin with a warm cake in the bag! Even guys can cook (and eat!)


Tuesday, October 12, 2010

mushroom pizza


Not to worry....we did not use these mushrooms on our pizza. Aren't they gorgeous though??


Instead, we used baby portobello mushrooms and some shitake mushrooms. They were simply sauteed with garlic, salt and pepper in butter and olive oil. After stretching the pizza dough, we drizzled it with olive oil, layered lots and lots of mushrooms, and sprinkled gobs of parmesan cheese on top! We declared it our favorite pizza of the summer!


Not as much color as the yellow mushrooms (: but very very tasty!!


Monday, October 11, 2010

Roasted Vegetables


...simple signs of fall...


...simple flavors of fall...


BrusselSprouts
ButternutSquashTinyYukon Gold
LeeksShitakeBabyPortabello
GarlicRosemaryParsley
SeaSaltPepper

Toss with olive oil....be generous! These vegetables were roasted without a flame and were done in 25 minutes. A small fire would have created brown crispy edges and probably would have been done 5-10 minutes sooner. With a flame, the vegetables would have to be watched closely and rotated occasionally...no distracting chit-chatting allowed... (I speak from experience....)

...Simplicity at its best....delicious!

Monday, October 4, 2010

Bacon Gruyere Frittata

I love picnics...my family thinks I am obsessed with them. My car always has a picnic blanket in the back...I give picnic baskets for shower gifts even when the couple has no interest...I firmly believe that food tastes better outside...

As summer comes to an end, we grasp every opportunity to picnic ... including breakfast. Last weekend, the morning temperature was 37 degrees, but the oven was still 400 degrees! We can't waste that perfect brick temperature! A quick assessment of the refrigerator ... only three eggs, but enough miscellaneous ingredients to make a mean frittata!

Bacon Gruyere Frittata

3 eggs
1 Tablespoon milk
carmelized onions (left over from the pizza)
chopped tomatoes
crisp smoked bacon...4-6 strips
fresh thyme
gruyere cheese...1/2 cup or so...
parmesan cheese sprinkled on top

I think traditionally, a frittata is made on a cooktop and finished in the oven, but we wanted to try the entire dish in the brick oven. The eggs were beaten with the milk, and the onions, tomatoes, thyme and bacon were gently stirred in. It was topped with shredded gruyere cheese and sprinkled liberally with parmesan cheese (because I sprinkle everything with parmesan cheese...)


We baked this about 15 minutes with the door closed.


Who knew three little eggs could poof like this??!! (:

The breakfast picnic was sunny and 48 degrees warm; the food was hot and tasty!! A thermos of hot cider and fleece blankets made it a memorable final picnic... (although it won't really be the final one...just don't tell my family.)


Thursday, September 30, 2010

pizza dough and other pizza tidbits


Trekking down a path like this to cook? How fun is that?! Funtastic!


I realize this looks like an out-of-control fire, but inside this oven, a test is underway to see if red bell peppers can be roasted while the oven gets up to temperature...The peppers get charred on all sides...then thrown in a paper bag to steam ... then the charred skin is peeled off. wow!! It worked!


I was reading about a pizza with grilled fresh corn, roasted red bell pepper, and smoked mozzarella. It sounded really good...and really unique! After getting a bit cocky with our roasted peppers, our humility was restored with our roasted corn...charred would be a better description. (: Below is a picture of the pizza with a few non-burned kernels. It was a fun new combination....I would top it with lots of parmesan, or a toss of sea salt...(more corn would have been good too!)


So, on to the dough recipe...

Being continually frustrated with dough that was too tough to stretch...then too fragile to stretch...

Being confused by all purpose flour... bread flour... King Arthur's 00 flour...

We took action, and googled Italian Caputo 00 flour. One would think that Italian flour would be readily available here....especially since Italy imports most of its wheat from North Dakota! (I am very proud of that, considering I was... well, still am... sort of... a ND wheat farmer) If you can make sense of that, you are good!
The site we found for the flour is www.brickovenbaker.com. This flour makes amazing dough.. it stretches easily without tearing, and has wonderful flavor and texture!

So, on to the dough recipe....again

4 cups Italian Caputo 00 flour
1 tsp salt
2 tsp yeast dissolved in 1/4 cup warm water
1 1/4 cup warm water

Mix together and knead for 7-8 minutes. Let rise about 2 hours until doubled in size.
Punch down.
At this point, we divide the dough into 5 pieces and put them in individual bowls....and if we are not going to use them for a few hours, we cover them with plastic wrap and put them in the refrigerator until an hour before pizza time!

Apparently you can freeze the dough in individual bags before the initial rising, then take the dough out of the freezer the morning of the pizza party to let it rise. We have not been able to try this yet .... it gets eaten as soon as it is made! If someone has tried this and knows the process, let us know!


Saturday, September 25, 2010

Apple Cinnamon Buttermilk Cake


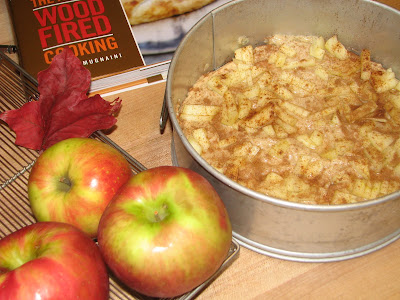
The cookbook in the corner of this picture has some helpful hints for cooking with a wood burning oven. I refer to it often! I guess that says something about my skills...or lack thereof. However, that is one of the things that makes this oven so much fun! You just never know what will happen. Luckily, it is usually not a total disaster. Just bring tin foil if the oven is too hot... bring wine if the oven is not hot enough (no, not to ignite the fire...) The other part that makes this oven so enjoyable, is the community that it builds. Such random fellowship...neighbors walking by... dogs eating the leftover pizza crust...spontaneous July 4th pizza party with visiting extended families....Sunday morning scones...Lake Superior trout packed in salt... Good stuff. Simple stuff.

The following Apple Cake recipe came from my favorite blog, Greens and Chocolate! It is delectably delicious! (Actually, I made three of them to give away! The oven stays hot a long time.... ) I have been on the watch for apple recipes, thinking we would have bushels and bushels of them from our fruitful(?) orchard. Rumor has it though, that Steve will have bees by spring and that should help with pollinating...and as an added perk, we will experience North Shore honey!


Apple Cinnamon Buttermilk Cake
from greensnchocolate.blogspot.com

1 cup flour
1/2 tsp baking powder
1/2 tsp baking soda
1/2 tsp cinnamon
1/4 tsp salt
4 T butter (1/2 stick)
2/3 cup sugar
1 tsp vanilla
1 large egg
1/2 cup buttermilk
1 cup chopped and peeled apple
1 heaping tablespoon sugar
extra cinnamon for sprinkling

Mix together dry ingredients and set aside.

Beat butter and sugar until fluffy.

Add egg and vanilla and continue beating.

Alternate adding buttermilk and flour mixture, ending with flour mixture.

Put in 9" cake pan (I used a spring form pan)

Sprinkle chopped apple over mixture.

Sprinkle with heaping tablespoon of sugar, and dust with cinnamon.

Bake at 400 degrees in conventional oven....the brick oven was approximately 450-500. The finished cake had a nice crisp topping, and the inside stayed remarkably moist. It took only 15 minutes (or so! Nothing is exact when dealing with a fire...) Very nummy...especially right out of the oven, but it was even good the next day!


Friday, September 24, 2010

Risotto with Roasted Butternut Squash and Bacon


Scott is on the shore today with his "hiking group". He really looks forward to these two days. They hike long and hard, and are trying to chip off the entire Superior Hiking Trail....two days a year. (: My dream would be to spend a week hiking to the oven and back with new food experiments in tow! Maybe I should organize an "eating group". Shouldn't be too tough to find...

With an entire weekend at home by myself, I decided to play with the woodburning oven in our backyard. For some reason, it is harder to make the commitment to use this one....other projects always get in the way. I saw this recipe on a blog yesterday, and remembered making a risotto dish in our oven class last fall. This was the day to try it!

Risotto with Roasted Butternut Squash and Bacon
adapted from The Art of Woodfired Kitchen and Guilty Kitchen.com


1/2 butternut squash, peeled
1 tsp fresh thyme
1 lb smoked bacon, thick sliced...cooked
1 pkg portabello mushrooms
3 T olive oil
1/2 cup chopped onions
2 cloves garlic
2 cups Arborio rice
6 cups chicken stock, heated
2 T unsalted butter
1/2 cup vermouth or dry white wine
1/2 cup freshly grated Parmigiano-Reggiano cheese

Dice squash into 1" cubes and place in sheet pan with fresh thyme. Drizzle with 1-2 T olive oil. With oven at "roasting temperature" (hearth approximately 550 degrees), roast squash about 6-8 minutes...do not fully cook at this point. It will complete cooking in the risotto.

Set heavy pan in the foreground of the oven with chopped onions and olive oil. Saute until softened....add garlic and roast a minute or two more. This can burn quickly so stay close.

Add mushrooms and saute until tender.

At this point, I transfered the onion, garlic and mushrooms to my bean pot because my saute pan was not big enough, but if you have a large one you can continue with that. Add rice, stir to coat with the oil, and cook about 3 minutes until lightly toasted and well heated.

Add hot stock to just cover the rice (about one cup). Stir, and then let sit in oven without stirring until liquid has been absorbed (about 5 minutes).

Repeat, allowing each addition of stock to absorb before adding the next.

After 15-20 minutes, add the squash mixture and wine and cook another 5 minutes or until rice is al dente.

Remove from oven and stir vigorously to increase creaminess. Stir in bacon, butter and cheese.

Garnish with truffle oil if you have some....more parmesan cheese of course...and freshly ground pepper!


Pretty good stuff! To keep the chicken stock hot, I would put it in a sauce pan and keep it at the front of the oven...

This was really fun and simple to make! It was such a gorgeous fall day here....and such a treat to be cooking outside. The hardest part for me.... splitting that wood! I found out later that two neighbors were chuckling as they watched me.... aim, focus, miss... I do appreciate that Bob always has perfectly split wood for our immediate use at the cabin oven. Thanks Bob!!

Wednesday, September 22, 2010

Fresh Peach Crisp


We got this recipe from a cooking class in Sonoma County last fall. The topping is chopped almonds, sugar, and butter. How could you go wrong with that?! Our mistake? (Do we always seem to have a mistake??!) The oven should have been about 450 degrees, but we were a bit rushed and slid the pans in the oven right after the pizzas were finished. The topping almost immediately started to burn. That oven was darn hot! A sheet of tin foil over the top solved it... the oven did its work...and it was darn good! It is amazing how adaptable food is in this oven. In a conventional oven, I wouldn't consider throwing an apple crisp in at 650 degrees. (:

Fresh Peach Crisp
from The Art of Woodfired Cooking by Andrea Mugnaini

2 cups whole almonds
1 stick unsalted butter, cut into 1" squares
1/2 cup packed brown sugar
1/4 cup flour

3 lbs ripe peaches (pears? or apples?) cut into 1" pieces
1/4 cup sugar
1/2 tsp cinnamon

Roughly chop almonds in food processor...or chop by hand if you are at a cabin without modern conveniences! (I have a tiny one that I got at Target for $5.99. It actually works pretty well...) Add butter, sugar, and flour until a crumbly mixture forms.

Toss peaches with sugar and cinnamon. Place in baking dish and top with 2 cups of topping. This recipe made much more than 2 cups of topping, so I refrigerated the extra, and ate it by the spoonful later. (I suppose I should not have admitted that....)
If using a ceramic dish, temper it at the mouth of the oven by turning it for about 3 minutes. Using cast iron will eliminate that step! Bake until peaches are heated through and the topping is beginning to brown, about 20 minutes.

If using apples, increase sugar to 1/2 cup and throw in a little nutmeg! Bake for 30 minutes.

Of course, you can use your favorite apple crisp recipe too! It works well after a pizza party. While eating the pizza, throw the dessert in the oven, and 20 minutes later.....ta da! A warm wonderful dessert!


Wednesday, September 15, 2010

Pizza!


Our goal last weekend was to use our homegrown ingredients from the shore. We were hoping to use the Worden grapes from our orchard in a new pizza combination, but alas....they were not ripe enough! Thanks to the North Shore Market and their abundant (?) supply of grapes, we were able to continue with our pizza plan, and combined the grapes with brie cheese, pine nuts and parmesan cheese. The result was terrific! I loved the sweetness of the grapes with the brie. As an added bonus, the grapes stayed slightly crunchy because of the quick 2-3 minute baking time. The oven temperature was 690 degrees, so dough did an immediate "spring" ... crispy light dough, crunchy grapes, and creamy brie.... ahhh! On top of that, it was a beautiful fall day!


Our next "orchard pizza" involved the Summercrisp pears....and although they were not quite ripe either...


...we sliced them very thin, and layered the pears with blue cheese, walnuts, and freshly grated parmesan cheese. It was declared a keeper by our visiting taste testers! We got the idea for adding nuts from Bill at www.woodfiredpizza.org. The nuts add a whole new dimension to the pizza, and we loved it! (If you decide to check out Bill's blog, also take a look at Don's blog...www.woodfiredkitchen.com. These guys have been really helpful...)


The honey crisp apples should have been ripe this week, but for some reason those trees did not even blossom this spring....!! ): Hopefully next year the neighborhood orchard will produce more abundantly and we will be making apple pizza, apple cake, and apple scones in the brick oven!


Wednesday, July 28, 2010

Skillet Corn Bread


I have a favorite recipe for cornbread from Redstone Restaurant, but I typically make it in the "regular" oven in a "regular" pan. However, I have always wanted to try cast iron corn bread... This was my feeble attempt, and I was quite pleased. The cast iron skillet worked perfectly in the hearth oven! The temperature must have been evenly distributed, it was crisp on the top and bottom, yet really moist in the center!

Corn Bread
adapted slightly from Redstone

3/4 cup cornmeal
3/4 cup flour
1 1/2 tablespoons baking powder
4 eggs
3/4 cup sugar
1/2 can cream corn (7 oz)
2 oz diced green chilies (optional)
1/4 cup melted butter
1/2 cup shredded cheese (monterey jack and cheddar blend)

Mix ingredients in order listed. Pour into 8" or 9" cast iron skillet, or 3 small ones...
Bake with flame at about 450 degrees. It takes about 20 minutes or until a clean birch stick comes out clean (in case you forget the toothpick) (:
This is really good with maple butter...pure north shore maple syrup mixed into butter...mmmm

Looking forward to hearing about some other cooking adventures in the neighborhood brick oven on the shore!

Jan


Monday, July 19, 2010

Loin of Pork


Saturday night we decided to try an entire meal in the brick oven. The menu consisted of pork loin with a mustard topping, roasted vegetables, corn bread, focaccia bread. The biggest trick was going to be... timing. No. The biggest trick would be...temperature. Well. The biggest trick was...black flies!

Loin of Pork
recipe adapted from Barefoot Contessa in Paris
oven specifics adapted from Wood-fired Cooking

1 pork loin, 5 bones
1 T olive oil
2 tsp dijon mustard
2 tsp whole grain mustard
salt/pepper

Roast at 550 degrees approximately 1 1/4 hours.
We used a cast iron pan, rotated it periodically until the top and sides were evenly browned, and then loosely covered it with tin foil until the desired temperature was reached.
The cookbook we used recommended keeping the flame in the oven...and to keep stoking the fire at the back of the oven with small kindling to keep the fire alive. We forgot...and let the fire go to coals, so the meat took 45 minutes longer. Not a huge problem, but the wine we were planning to drink with dinner was consumed before dinner. (:

The hungry fire master...wondering why it is taking so long...

...and his revived fire...

...and yes! It is done!

It was a fun experiment and the meat was moist and tasty....definitely worth the wait! ...plus, the black flies finally gave up and left us alone.


Bran Creation revisited...

For those of you who have not been on the shore recently, the stone work is in place and it looks rustic and gorgeous! Thanks to the guys who hand picked the stones out of the ditches by Lutsen, arranged and mortared them, then sanded them to perfection. It is nothing short of amazing! Also new to the structure is a beautiful timber railing so no one will topple over the edge....


Now to continue on with Bob's creations.... I still don't have the exact recipe....
...but Pat got involved, added some walnuts and raisins, and ta da! Fruity, crunchy, nutritious bran....even better then before! I might come to the oven every Sunday morning to sample the baking projects! The oven temperature was 350 degrees, and seemed to be perfect for this!


Sunday, July 11, 2010

Bob's Bran Creation


Some cooks use toothpicks to see if their baked goods are done. These two sophisticated bakers are looking for a specific temperature on their probe....180 degrees to be exact....!


Even the dough looks good!! Once again, we got so excited to taste it, that we forgot to take a picture of the final baked product!! (:

Bob somehow adapted a bran muffin recipe into scones. He casually mentioned something about a mix from the Amish bakery in Beaver Bay, MN but I don't know the exact details. I only know that they tasted wholesome, wonderful, and worthy of praise! They would also be good with butter, blueberry jam, or North Shore honey...

What a fantastic way to start a summer day! Now we just have to pry the recipe from Bob... (: