
I can't believe the last posting on this blog showed a snowshoe trail to the oven! Now it is almost July! I have missed cooking with wood...by the water...surrounded by trees! Our spring was busy busy busy.... two of our kids graduating from medical school; then three of them moving; then one of them getting married! Such a fun spring! But we were ready for some down time...and since it was our anniversary...we seized 5 days and escaped to Lake Superior...
I pondered (agonized actually) over what to give my husband for our anniversary! Finally, I decided to give him a paella gift basket, with the paella pan and all the fixings he would need. Just so this does not appear as a self-serving gift, I have to add that he truly has been wanting to try this meal in the woodburning oven!! He likes the Spanish tradition of everyone eating directly out of the pan...probably because it cuts down on his dish washing responsibility...
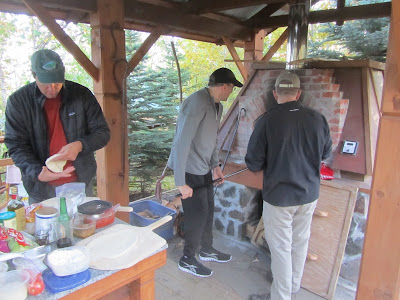
He seemed very excited with the gift, and started organizing and chopping the ingredients so the assembly of the paella would be simple at the oven.
Once all the ingredients were chopped and put into little zip-lock bags, we loaded up the necessities ... including the picnic blanket...
...into the "golf cart" that is usually used for hauling rocks, dirt, and such... Today though, it will whizz all of our paella ingredients to the brick oven on the shore!
We got the oven to about 500 degrees, and started to "organize" our ingredients. It looks organized doesn't it????
Once the onions had been sauteed, we added the garlic for 2 minutes; then the chorizo for 5 minutes; then on to saute the rice for 5 minutes...
Then we added the canned tomatoes, added the chicken broth with seasonings, added more wood (to the fire, not the paella), closed the door, and didn't peek for 20 minutes. This was really really hard.... the not-peeking part.
We stirred it once...and only once. Evidently this is critical for the crust to form. After about 30 minutes, when much of the liquid had evaporated, we added the rest of the vegetables and stirred lightly, keeping extra chicken broth and white wine handy if the rice got too dry.
The oven could have been a bit hotter...maybe 600-650 degrees to get a really crispy crust. But the end result was wonderful....woodsy....
Now....... on to the Caribou River for Sangria....
Roasted Tomato and Artichoke Paella
slightly adapted from the Kitchen Window, Minneapolis
1/2 cup reserved olive oil from Oro Cori Grilled Artichokes in Oil
1/4 cup reserved olive oil from Pomodoraccio Semi-Sundried Tomatoes in Oil
1 large onion, medium diced
5 cloves garlic
8 oz Palacios Hot Chorizo (dry cured), thinly sliced. I would double this...
1 red bell pepper
1 green bell pepper
handful of sugar snap peas
1 cup semi-sundried tomatoes, halved (type is listed above with the oil)
1 jar grilled artichokes (type is listed above with the oil)
1 14 oz can whole preminum tomatoes (San Marzana or Muir Glen)
2 cup Bomba rice
4 cup chicken stock
1 tsp pimenton
1 tsp tumeric
1/4 tsp saffron
1/4 tsp oregano, dried
salt and pepper to taste
1 Tbsp minced parsley
optional shrimp, clams, serrano ham...
Because this was a gift, we had all the specialty items ... the grilled artichokes, semi-sundried tomatoes etc...that were purchased at The Kitchen Window in Minneapolis. Certainly, other brands from a regular grocery store could be used.
The recipe calls for this to be done on a grill, which is why we wanted to tackle it in the woodburning oven... (:
Add tumeric, saffron, pimenton, oregano, salt and pepper to your stock and set aside.
Heat the oil in an 8 person paella pan. Add the onion and saute until transparent but not brown.
Add the garlic and cook until softened but not brown.
Add the chorizo and cook for about 5 minutes.
Add the rice and saute for 5-10 minutes
Pour in the stock that has been combined with dry seasonings, and the can of tomatoes.
Stir once, but do not stir any more. Close door to your oven ...or grill
Cook for 20-30 minutes or so, until the bottom appears crispy.
Using a spatula, turn over the rice, scraping the (hopefully) crispy bottom.
This is where we added the vegetables...and alittle more broth if needed...and some white wine..
Avoid scraping the bottom of the pan and disturbing the crust...
Cook for 5-10 more minutes or until the liquid has been mostly absorbed and the rice is tender.
Serves waaaay more than 2 people....these two forks are working hard...


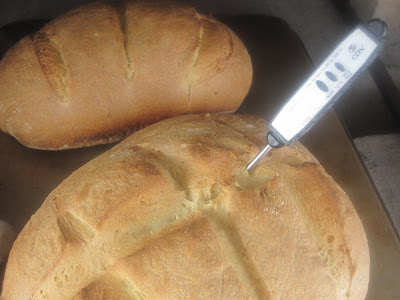
 Here is the nearly perfect shape of Keeley's Kreation...topped with sausage, peppers, gruyere cheese, and parmesan cheese.
 Oops....nice photo...lost some peppers from the first pizza...and forgot to put the fresh arugula on the brie, pine nut and grape pizza. Still mighty tasty though! Putting fruit on a pizza is very man-ish...
 This is perfection! ahhhhh... Good job Jake ( we will give you his phone number if you leave a comment)
 Mushroomsmushroomsmushroomsmushrooms...crispy parmesan, carmelized onions.....absolutely DYNAMITE Bob and Todd...
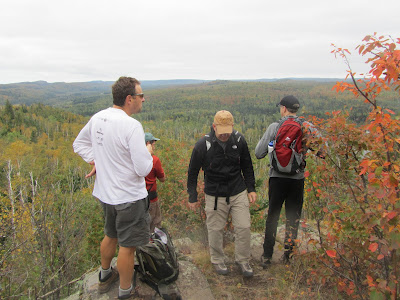
 ...discussing the route for 2012 ... deep pondering... is there a need to slacken the pace for the old guy in the pack?


