Wednesday, February 16, 2011

Sourdough Bread


I canceled my piano students this week, and drove to the cabin to spend some time with my daughter. While she studies and does her required rotation in Grand Marais, I get to stoke up the brick oven, cook, read, knit and snowshoe. Three whole days of bliss! Where should I start??? The trek to the oven....on snowshoes of course...


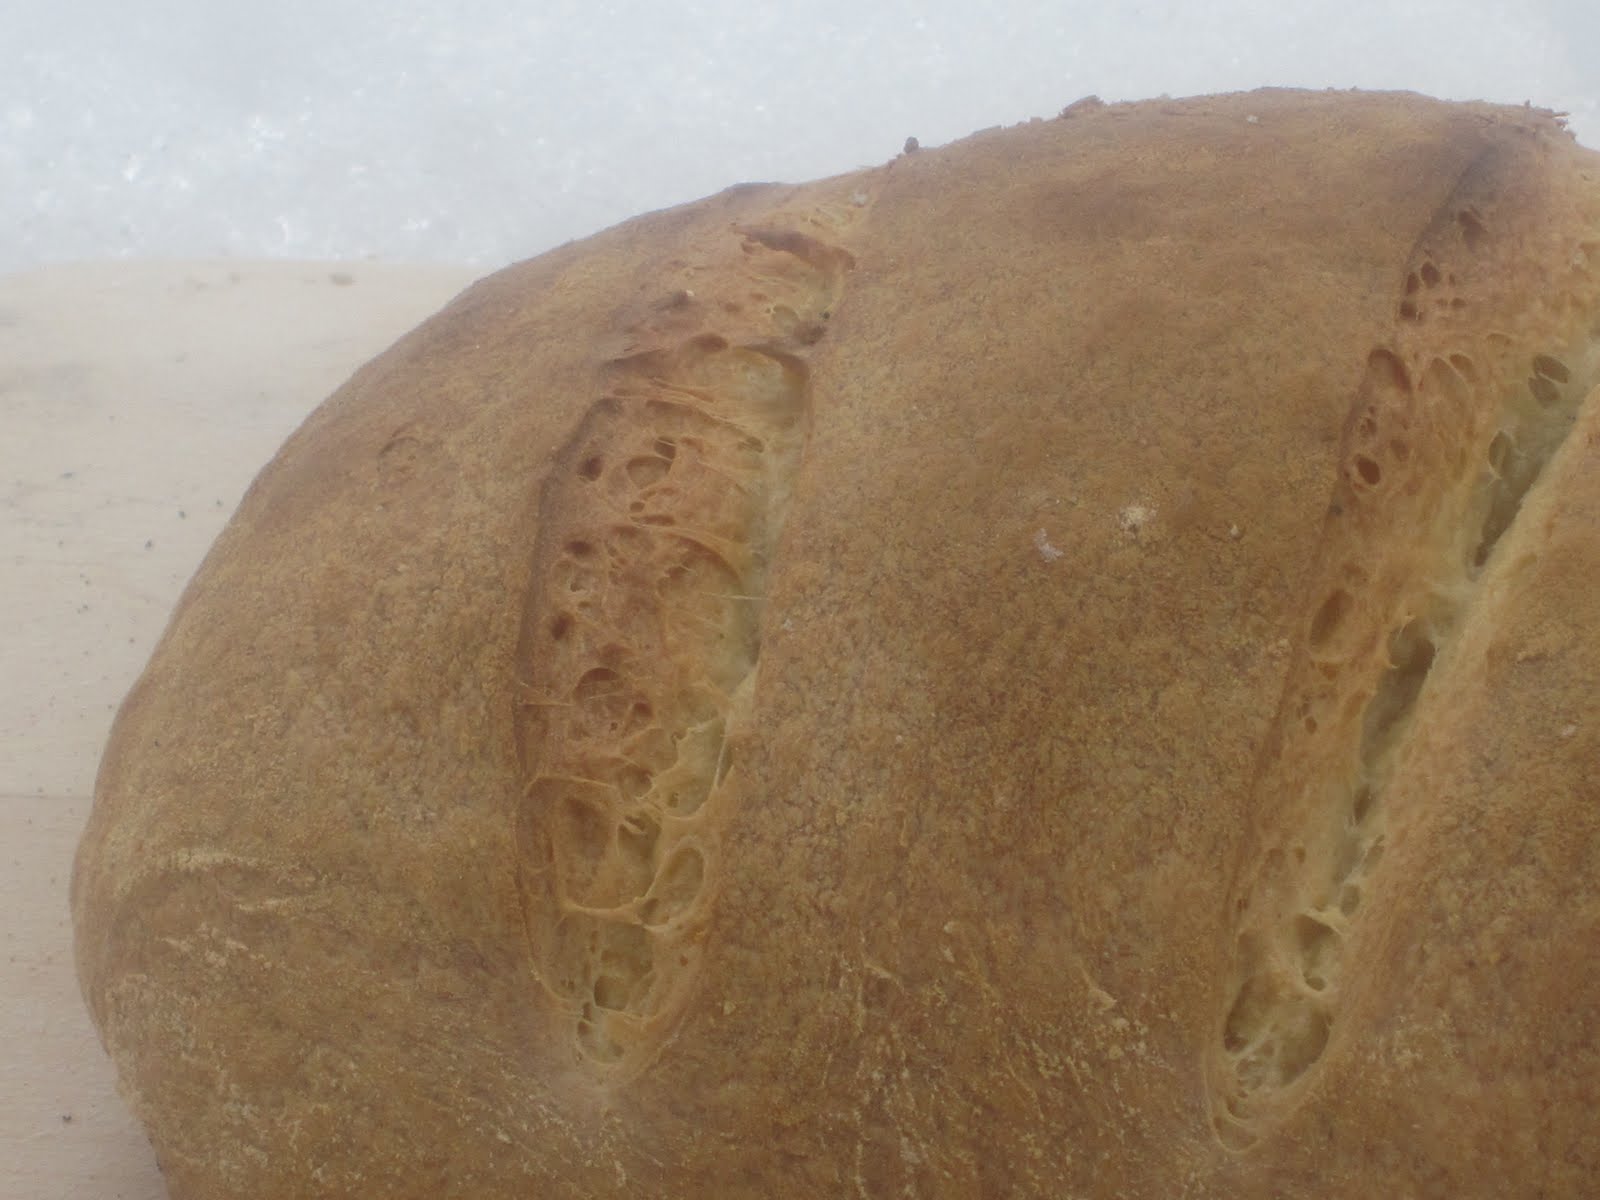
This sourdough bread recipe called for forming the loaves the evening before, and letting them rise in the refrigerator overnight. They looked positively beautiful in the morning! But alas, the journey to the oven deflated them a bit....


Somehow though, this brick oven can make things poof...and magically turn blobs of deflated dough into loaves of bread!

It is hard for me to tell when bread is done. Various bread books say to tap the loaf and it should sound hollow. hmmmm...I don't get that. How does hollow sound exactly? This digital thermometer took that stress away! According to the recipe, it should register 200-205 degrees. Now that I can understand!

Ahhhhhh....a quick cool-down in the snow....and then, please pass the butter...

Sourdough Bread
from Annies Eats

Sourdough Starter
2 cups warm water
1 tbsp. sugar or honey
1 tbsp. active dry yeast
2 cup unbleached all-purpose flour

Pour warm water into glass bowl. Stir in sugar or honey to dissolve. Stir in yeast. Gradually whisk in the flour. Cover loosely with a kitchen towel (not plastic wrap) and place in a warm area. Let it develop at room temperature 2-5 days, stirring once a day due to the separation that will occur. When bubbling has subsided and a sour aroma has developed, stir again and refrigerate until ready to use. I used a screw top glass container.

To maintain the starter, replenish it every time it is used by adding 1 cup flour and 1/2 cup water, and letting it sit at room temperature for 12 hours. This should be done every 2 weeks.

Sourdough Bread (makes 2 large loaves)

1 1/2 cup lukewarm water (100 degrees F)
4 tsp. active dry or instant yeast
1 tbsp. honey
1 cup sourdough starter
5 1/2 -6 cup bread flour, plus more as needed
1 tbsp. unsalted butter, melted
2 1/2 tsp. salt
1 tbsp. bread flour mixed with 1 tbsp. yellow cornmeal

Using an electric mixer bowl, whisk together water, yeast, honey and sourdough starter until smooth.

Cover with plastic wrap until slightly increased in bulk and bubbly, approximately 1 hour.

With flat beater, using low speed, mix in 3 cups of the flour, butter, eggs and salt.

Increase speed to medium low and beat 1 minute. Add 2 more cups of flour and beat for 2 minutes.

Switch to the dough hook. With mixer on low speed, add remaining flour, 1/4 cup at a time until a very soft dough forms that pulls away from the sides of the bowl. Knead on low speed, adding a tablespoon of flour if dough begins to stick, until dough is smooth and elastic, tacky but not sticky... about 6 minutes.

Form dough into ball. Transfer to lightly oiled bowl, turning once to coat. Cover loosely with plastic wrap and let rise until double in bulk... about 1 1/2-2 hours.

Line cookie sheet with parchment paper. Sprinkle generously with the flour-cornmeal mixture.

Divide dough into two equal portions, and form into tight oval loaf. Place on prepared baking sheet.

Sprinkle tops with flour and gently rub in.

Cover loosely with plastic wrap and let rise in refrigerator, 8-12 hours.

Before baking, make three slashes across the top with a sharp razor blade or sharp knife.

Here is where the recipe deviates from Annies-Eats.
For a wood burning oven:

If using a brick oven, the oven temperature should be about 550 degrees, and the hearth about the same. (so much for the exact science of bread baking...)

If the bottom of the loaves seem to be getting too dark, you can use an overturned baking pan and place the loaves on that in the oven. That seems to protect the bottoms from getting burned if the hearth floor is too hot.

Bake until the temperature registers 200-205 degrees. I think it took about 25-30 minutes, but my cell phone was my timer, and I lost service. Another "exact science" moment....

For a conventional oven, here is what Annies-Eats recommends:

Using a baking stone, preheat to 450 degrees.

Place loafs on stone and bake for 10 minutes.

Lower heat to 400 degrees and continue baking for 25-30 minutes.


So I can safely assume...no picnic today?


Saturday, January 8, 2011

artisan bread


I've tried to make artisan bread too many times to count. I've tried the sourdough starter thing...keeping a jar of it in the refrigerator at the cabin until one of our kids called with horror "what is that jar of moldy gray stuff in the frig???" OK. I guess trying to keep sourdough alive and well at a cabin is not possible... However, when I tried a recipe from "Artisan Bread in Five Minutes a Day" I got re-inspired!! This is easy! No sour mixtures sitting in the frig! No kneading required! And as an added bonus, it tastes wonderful!

The recipe I tried was European Peasant Bread. There is a small amount of whole wheat flour, which of course, made me feel like I could eat the whole loaf and not feel a bit guilty. Whole wheat is good right? Never mind that it is only 1/2 cup whole wheat to 5 1/2 cup all purpose....

European Peasant Bread
from Artisan Bread in Five Minutes a Day

3 cups lukewarm water
1 1/2 tablespoons granulated yeast
1 1/2 tablespoons salt
1/2 cup rye flour
1/2 cup whole wheat flour
5 1/2 cup unbleached all-purpose flour

Mix the yeast, salt and water.

Mix in the remaining dry ingredients without kneading. You can use the dough hook on a mixer or just a wooden spoon.

Cover and allow to rest at room temperature until the dough rises and collapses, flattening on top. This should take about 2 hours.

The dough can be used immediately, although it is easier to use if it is cold. Now (this is the best part) it can be stored in the refrigerator for 14 days!! Just make sure it is in a lidded but not airtight container.

On baking day..."dust the surface of the refrigerated dough with flour and cut off a grapefruit-size piece. Dust with more flour and quickly shape it into a ball by stretching the surface of the dough around to the bottom on all four sides, rotating the ball a quarter turn as you go. Allow to rest and rise on a cornmeal-covered pizza peel for 40 minutes." After 20 minutes, liberally sprinkle top of dough with flour and slash with a serrated bread knife. You can slash whatever design you want...a cross, 3-4 parallel lines, or tic-tac-toe!!

Here are the options for baking:

...outside in woodburning oven. The oven should be about 550 degrees without a flame. Bake about 30 minutes until browned. You can see it gets pretty dark in the wood burning oven. If it gets too dark, just throw handy-dandy tin foil over...

...conventional oven on a pizza stone. Preheat the stone in a 450 degree oven. Place a broiler pan on any shelf in the oven that won't interfere with the bread rising. Slide loaf onto hot stone, immediately pour 1 cup hot water into the broiler pan, and quickly close the oven door. Bake approximately 35 minutes until top crust is deeply browned and very firm.

...conventional oven in a dutch oven casserole. I think this is the easiest. Make sure the knob on your casserole will withstand 500 degrees. Evidently the plastic knobs will start smoking at 450 degrees! Not a pleasant odor for your fresh bread to absorb...

1) Shape the boule, and let it rest on parchment paper for about 40 minutes.
2) Preheat the pot with the lid on for about 20 minutes at 500 degrees.
3) Slash the dough about 1/4 inches deep.
4) lift the dough and drop it carefully, paper and all, into the preheated pot. Replace the lid and slip it back into the oven.
5) After 15 minutes, remove the lid, turn the heat down to 450 degrees and bake another 15-20 minutes. The lid initially enabled the dough to bake in the steam and now without the lid, the dough will develop its wonderful caramel color!
6) I would try using an instant read thermometer to determine if the bread is done. From what I have read, the bread should be 205-210 degrees. I think this loaf was not quite done...but I did not have a thermometer to check it...

The directions I used for this method came from the following site: http://www.artisanbreadinfive.com/?p=552 (Baking Bread in a Dutch Oven)
It has thorough directions...and better pictures! (: Also, I would recommend the book!

Fun.....delicious....and easy enough for fresh crusty bread every night!


Sunday, January 2, 2011

Herb-roasted turkey breast

Our son used the cabin last week with friends from his days at St Olaf college. While he was there, neighbor and ovenbuilder Greg called the cabin and said the oven was going to be stoked for the New Years weekend. Needing something healthy that was compatible with getting rid of the 5 lbs accumulated over Christmas, I searched Ina Garten's new cookbook! Herb roasted turkey breast caught my eye. It sounded really fresh tasting with all the herbs....and it was!!

The turkey breast I used was half the size that the recipe called for...but I made the same amount of marinade, rubbed most of it over the breast, and tried to smear some of it under the skin.


Herb-roasted turkey breast
from Barefoot Contessa

1 whole bone-in turkey breast (approximately 7 pounds)
2 tablespoons good olive oil
3 cloves garlic, minced
2 teaspoons freshly squeezed lemon juice
2 teaspoons dry mustard
1 tablespoon chopped fresh rosemary leaves
1 tablespoon chopped fresh sage leaves
1 teaspoon chopped fresh thyme leaves
1 1/2 teaspoon kosher salt
1/2 tsp greshly ground black pepper
1/4 cup dry white wine

We prepped the oven to roasting temperature...approximately 450-500 degrees, and kept a small flame burning. After rubbing the marinade over the turkey breast, and pouring the wine in the bottom of the roasting pan, we roasted it approximately an hour until the thermometer registered 165 degrees. We covered it with tin foil when it started to brown too much, and rotated it a few times for even cooking. Letting it rest for 10 minutes after cooking was the hardest part....we wanted to dive right in! Roasted yukon gold potatoes and brussel spouts completed the meal!


Wood-Roasted Shrimp

What a beautiful snowy December we had here in Minnesota!! We decided to fire up the wood burning oven for Christmas...but with something less stressful than a turkey! Roasting shrimp takes only 6 minutes! Standing in the snow at 10 degrees, one can only handle about 6 minutes!

Wood-Roasted Shrimp
from Mugnaini's At of Wood-Fired Cooking

2 pounds shelled raw shrimp
1 teaspoon sea salt
1 teaspoon lemon zest
3 tablespoons fresh lemon juice
2 tablespoons olive oil

Prepare the oven for a roasting environment, which means it has been prepped to reach pizza oven temperatures, then allowed to drop in temperature. There should be a medium sized bed of coals and a small flame. The hearth temperature should be about 550 degrees, and no less than 450 degrees.

Place shrimp in medium bowl and add the remaining ingredients. Place onto a sheet pan (we used a paella pan), set in oven and roast for 6 minutes until pink and firm to the touch.

Sauce
from Barefoot Contessa

1/2 cup Heinz chili sauce
1/2 cup Heinz ketchup
3 tablespoons prepared horseradish
2 teaspoon fresh lemon juice
1/2 teaspoon Worcestershire sauce
1/4 teaspoon Tabasco sauce

Mix together, and serve with the shrimp.

Easy and delicious!!


Tuesday, October 19, 2010

Beef Bourguignon


As you know from the last blog, Jan's birthday is in October. She love love loves October...fall foods, crisp air, yellow leaves....you know the deal. As a result, October is simply called Jan's birth month, and she likes to celebrate all month.

This year I wanted to take her out for dinner, but her version of "out for dinner" meant "out to the wood burning oven". OK OK I thought that was reasonable...probably cheaper too...and if she cooked, I would be her assistant and write a blog about it. So here we go...

This was her itinerary for her birthday. Light the fire in the oven, and get the temperature to maybe 350 degrees. That seemed easy enough. So far so good. She wanted to try a french dish, Beef Bourg...something. I couldn't say it, but she couldn't either. Evidently this dish cooks for hours and hours, and during that time she wanted to go on a hike, and have appetizers on the Caribou River. Sounded good to me.
This is her new birthday present. Cast iron from Finland. I liked the handle. I think she liked it better than the vacuum cleaner I got her. We won't dwell on that, so onward to the oven. I got the temperature to 450 degrees. I thought that was close enough. She did too. The new pot and the french stew went into the oven, and we were on our way...
The birth month girl...

...and her sherpa, carrying her prize winning leaves in my backpack. I think I'm doing a pretty good job at this birthday stuff.

Now, on to the appetizers...and her favorite wine holder on the Caribou River. My backpack now had cheese and crackers instead of leaves...but I forgot the picnic blanket. In my mind, that was the minor part. Jan, on the other hand, would forget the corkscrew, but not the blanket.

Back to the oven where the mushrooms are added for one of the final steps. Now the oven is where it should be...about 350 degrees. Keep in mind, I have been adding wood periodically. Afterall, that was one of my responsibilites as the assistant.
I have to say. This was lookin good. Really good. Jan toasted some baguettes in the oven, then swiped a garlic clove over the warm toast. It smelled great.

The french stew was served over the garlic toast. It was an amazing meal...probably because of my assistant skills.

I will let Jan write the recipe:

Beef Bourguignon
combined recipe from Barefoot Contessa and The Kitchen Window, Minneapolis
adapted to feed 2 - 3 people

4 oz thick applewood smoked bacon
good olive oil
1 1/2 lbs chuck beef cut in 1 inch cubes
1/2 lb carrots in 1 inch chunks
1 onion, sliced
1 large clove garlic
1/2 bottle good red wine (I used a Pinot Noir)
1 cup beef broth
1 tablespoon tomato paste
1/2 tsp dried thyme leaves
2 tablespoon butter
1 1/2 tablespoon flour
1 lb fresh mushrooms

Cook bacon until crisp.

Dry beef cubes with paper towel, sprinkle with salt and pepper, and brown in olive oil. Remove from pan. Add a little more olive oil, onions, carrots, some salt and papper, and sautee for 10-15 minutes until onions are lightly browned. Add garlic and cook 1 more minute.

Put meat and bacon back in the pot with the juices, and add the wine and enough beef broth to almost cover the meat. Add tomato paste and thyme.

At this point, I brought it to the wood burning oven which was 450 degrees...a bit hot maybe, but it seemed to work fine. We let it burn down to a small flame before we added more wood, and so most of the cooking time it was about 350 degrees.

About 15 minutes before eating, we added the mushrooms which had been sauteed in butter, and the 1 1/2 tablespoon of flour which had been smashed with a tablespoon of butter.

We let this simmer to thicken a bit and used that time to toast the baguette, rubbing with a clove of garlic after they were hot and toasted.

We served the beef over the toasted bread, and sprinkled with fresh parsley...

(ps from the assistant) I think I did a pretty good job. I even found a candle.


Oatmeal Date Cake

Jan's birthday is in October, and she says the leaves are always peak for her birthday. This year was no different. The leaves were good. Humble as I am though, I think the cake I made for her was even better.
Oops. Slopped a bit on the sides as I slid it in the oven.

After it was done, I spooned on the icing. Coconut, butter, pecans, sugar to be broiled. How does one broil in a woodburning oven? A flame of course. I added some kindling to the coals. Now it's starting to get fun.
Not a bad broiler.

This is absolutely my favorite cake. Moist and delicious. I ate most of it. But just so you don't think I am selfish, it's Jan's favorite cake too...and I let her have a piece.


Oatmeal Date cake

from Doris Lund

  • Pour 1 cup boiling water over:
  • ½ cup(+) chopped dates
  • 1 cup oatmeal.
  • Let cool.
  • Cream together the following:
  • 1 cup brown sugar
  • ½ cup white sugar
  • 2 eggs
  • ½ cup butter
  • Add flour mixture:
  • 1 cup flour (+)
  • 1 tsp soda
  • ½ tsp cinnamon
  • 1 tsp vanilla
  • Add oatmeal mixture
  • Bake at 350 for approximately 30 minutes or until center is done. This is easiest in a 7x11 pan, but a square 9x9 works or a springform pan (adjust baking time).
  • Mix the following, spread on warm cake and broil for 1-2 min until brown:
  • ¼ cup butter
  • 2/3 cup brown sugar
  • ½ cup pecans
  • 1 cup coconut
  • 3 Tbls milk
On my way back to the cabin with a warm cake in the bag! Even guys can cook (and eat!)


Tuesday, October 12, 2010

mushroom pizza


Not to worry....we did not use these mushrooms on our pizza. Aren't they gorgeous though??


Instead, we used baby portobello mushrooms and some shitake mushrooms. They were simply sauteed with garlic, salt and pepper in butter and olive oil. After stretching the pizza dough, we drizzled it with olive oil, layered lots and lots of mushrooms, and sprinkled gobs of parmesan cheese on top! We declared it our favorite pizza of the summer!


Not as much color as the yellow mushrooms (: but very very tasty!!